
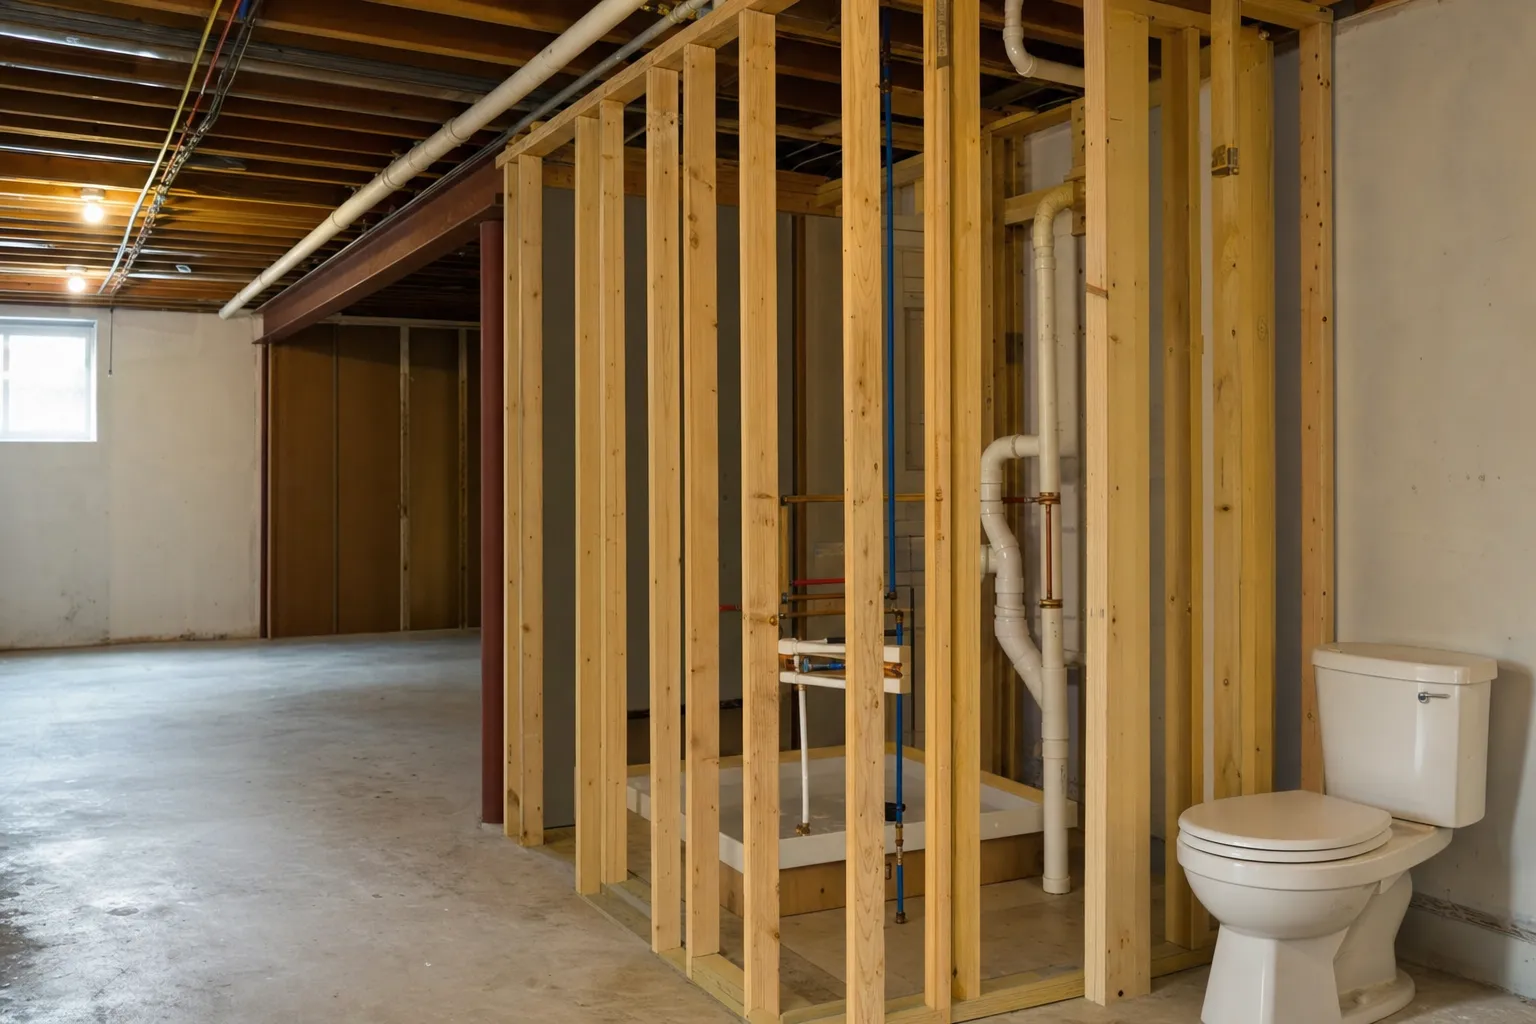
Adding a full bathroom with rough-in plumbing is among the most expensive parts of finishing a basement in Brownsburg. Installing drain, waste, and vent lines below a concrete slab requires breaking the floor, excavating around the pipes, and re-pouring the concrete after installation. No other single finish element matches that sequence in skilled labor hours or material cost. Electrical panel upgrades, egress window cuts, and waterproofing remediation are the next most common sources of budget growth. All four cost drivers are generally discoverable during a pre-project site walkthrough, before framing begins. Knowing which of these applies to your specific basement is what makes an accurate, predictable budget possible from the start, not a number that expands after framing has already begun.
Why does adding a bathroom make a basement finish so expensive?
A basement bathroom requires breaking into the concrete slab to install drain lines below the existing floor level. That process drives up both labor hours and material cost more than any other single finish element.
Rough-in plumbing must connect new drain, waste, and vent lines to the home's existing stack. That connection is required by code and demands licensed plumbing work, regardless of bathroom size.
Below-grade plumbing often can't rely on gravity drainage. When the basement floor sits below the sewer line, an ejector pump (a sealed pit that grinds and pumps waste up to the stack) or a macerator unit becomes a required part of the system.
The full sequence looks like this: concrete cutting, floor excavation, pipe installation, gravel backfill, and concrete re-pour. That's substantial skilled trade labor before a single wall goes up or a single fixture is selected.
What catches a lot of homeowners off guard is that even a half-bath with only a toilet and sink requires this same below-slab process. The fixture count doesn't change the excavation requirement. Any basement bathroom, large or small, is a major line item in the project budget.
What is rough-in plumbing and why does it cost more in a basement?
Rough-in plumbing refers to all the drain, supply, and vent pipes installed before walls are closed and finishes go on. In an above-grade bathroom, those pipes run through open floor cavities and stud bays, which are already accessible.
In a basement, drain pipes must sit below the concrete slab. Getting them there requires cutting the slab, digging down to the required pipe depth, setting the pipes at the correct slope, and then re-pouring concrete to restore the floor. Supply lines can sometimes run along the ceiling or walls, but the drain side has no shortcut. That excavation and re-pour is what separates basement bathroom plumbing cost from above-grade bathroom plumbing cost.
What triggers an electrical panel upgrade during a basement finish?
An electrical panel upgrade becomes necessary when the existing panel lacks enough open circuits to safely power new basement lighting, outlets, appliances, or HVAC equipment. The panel is the hard limit on what the home's electrical system can handle.
Homes built in earlier decades often have panels rated at 100 amps. Adding a home theater, wet bar, or bedroom with a dedicated HVAC zone can push total demand past that capacity. A 100-amp panel that already serves a full home may have little room left for a finished basement's electrical load. We see this regularly in houses from the '70s and '80s.
A licensed electrician, or the permit inspector during rough-in review, will flag an undersized panel. That flag doesn't stop the project, but it adds a required step before electrical rough-in can pass inspection.
Upgrading to 200-amp service involves more than swapping the panel box. The utility company must coordinate a service disconnect, a new meter base gets installed at the exterior, and the panel itself is replaced. Each of those steps carries its own labor and material cost, and each adds time to the project schedule.
This cost can't be predicted from a floor plan alone. It requires a physical look at the existing panel, the service entry, and the current load. No contractor can accurately scope the electrical portion of a basement finish without that inspection.
Can you finish a basement without upgrading the electrical panel?
Sometimes yes, depending on what the existing panel can actually support. If the existing panel has open circuit slots and sufficient amperage to cover the new basement load, a basic finish with modest electrical demand may not require an upgrade.
A bedroom with recessed lighting and standard outlets places far less demand on a panel than a home theater or a room with a dedicated mini-split. The determining factor is always the available capacity in the existing panel, not the finish scope in isolation. We verify panel capacity before framing begins, because adding circuits to a full or undersized panel isn't something that can be worked around later.
Why is egress window installation a major cost in Brownsburg basements?
Egress window installation is expensive because it requires cutting through a poured concrete or block foundation wall, excavating a window well on the exterior, and waterproofing the new opening against future water intrusion.
Indiana building code requires at least one egress window in any basement room classified as a bedroom. Skipping the egress window means the room can't legally be permitted or marketed as a sleeping space, regardless of how it's furnished. No exceptions.
The foundation cut alone requires specialized saw equipment and careful planning. Foundation walls carry structural load, and cutting an opening without accounting for that load path can compromise the wall's integrity. We plan the opening size, header support, and any required reinforcement before the cut is made.
On the exterior, a window well must be excavated, lined with a steel or plastic well form, and in many cases fitted with a gravel drain bed or a drain line to prevent water from pooling against the new window opening.
Egress windows aren't a line item you can remove from the budget if a room is intended for sleeping. The code requirement is fixed to the room's use, not to how much you'd prefer to spend.
What size does an egress window need to be in Indiana?
Indiana follows International Residential Code (IRC) standards for egress window sizing, published by the International Code Council. A compliant egress window must meet all three of the following requirements:
- Minimum net clear opening area: 5.7 square feet of unobstructed opening when the window is fully open
- Minimum clear dimensions: at least 24 inches in clear height and at least 20 inches in clear width
- Maximum sill height: the window sill must be no more than 44 inches above the finished floor level
All three conditions must be met at the same time. A window that meets the area requirement but not the height or width requirement doesn't pass. The sill height requirement also dictates how high the window can be placed in the wall, which affects where the window well is positioned on the exterior.
How does waterproofing remediation affect the total cost of a basement finish?
Waterproofing remediation adds cost because finishing over an active moisture problem will damage drywall, flooring, and framing over time. Any water issue in the basement must be resolved before finishing begins, not after.
Brownsburg sits in Hendricks County where clay-heavy soil retains water and holds hydrostatic pressure (the outward and inward force of water-saturated soil) against foundation walls. Seasonal rainfall in central Indiana is consistent enough that a basement with any existing vulnerability will show the problem. We'd rather find it early and deal with it once.
Remediation scope varies widely depending on severity. Minor grading problems or misdirected downspouts can sometimes be corrected at the exterior with little excavation. More serious intrusion may require an interior drain tile system.
An interior drain tile system involves breaking the perimeter of the concrete floor, installing a channel that directs water to a sump pit, and then re-pouring the perimeter. A sump pump moves the collected water out of the pit and away from the home. This is substantial labor in an unfinished space, and far more labor and cost if the space has already been framed and drywalled.
When we identify active seepage during a walkthrough, we address it before finishing work begins. Doing remediation after the finish is in place means removing drywall, flooring, and framing, completing the waterproofing work, and then refinishing the space. That sequence costs substantially more than addressing the problem at the start.
How can you tell if a Brownsburg basement has a water problem before finishing?
Homeowners can check for these five signs before a contractor visit:
- Efflorescence: white or gray mineral deposits on concrete block or poured walls, left behind when water moves through the wall and evaporates
- Rust stains: orange or brown streaks near the base of the wall or around anchor bolts, indicating sustained moisture contact with metal
- Musty odor: a persistent smell, especially after rain, that indicates mold or mildew growth in wall cavities or on the floor
- Horizontal cracks in block walls: cracks running along mortar joints, which indicate lateral pressure from the surrounding soil
- High-water marks on the floor: faint staining lines or tide marks on the concrete floor showing where standing water previously reached
Check after a rainfall, not just on a dry day. That's when the basement shows you what it actually does.
Which basement finishing costs are fixed and which ones vary?
Some basement finishing costs are set by code or physical necessity, while others depend on the scope you choose. Understanding the difference helps avoid budget surprises.
Fixed costs are those that apply regardless of what you want. Permits are required for any structural, electrical, or plumbing work. Egress windows are required in any room used for sleeping. Structural problems in the foundation or floor system must be corrected before framing begins. These costs aren't negotiable through design choices.
Variable costs shift based on selections made during the design phase. Flooring material, ceiling type (drywall versus drop ceiling versus exposed), lighting style, wet bar versus full bar, and built-in storage versus none are all choices that move the budget up or down without affecting code compliance.
Semi-variable costs sit in between. Plumbing and electrical depend on both what you want to add and on what the existing systems can actually support. A homeowner who wants a simple bedroom adds less electrical load than one who wants a home theater, but both may or may not need a panel upgrade depending on the existing panel's capacity.
What is the cheapest way to finish a basement without skipping required steps?
The lowest-cost compliant basement finish uses materials that meet code without adding elective upgrades. Open-cell spray foam or faced batt insulation handles the thermal and vapor requirements. Standard drywall over metal or wood framing closes the walls and ceiling. Hard-surface flooring that can be applied directly over the slab, such as luxury vinyl plank, is generally among the more cost-effective options compared to tile or engineered hardwood, though costs vary by material and market. Basic recessed LED lighting meets code without specialty fixtures. A single egress window satisfies the bedroom requirement if one sleeping room is planned.
This approach meets every required element while keeping elective spending minimal. The fixed costs, including permits, egress, and any required remediation, stay in the budget regardless of which optional upgrades come off the list.
Why does a pre-project walkthrough matter for basement cost planning?
A pre-project site walkthrough can surface expensive issues before framing begins. Panel capacity, moisture intrusion, structural concerns, and egress requirements are generally findable during a site visit rather than after walls are closed.
Finding a panel upgrade requirement after the basement is framed and drywalled creates a disruption that costs more than finding it on day one. The electrician now works in a finished space, and any wall penetrations or access points that were straightforward during rough-in become a tearout-and-patch situation. We've been in that situation with homeowners, and it's never a comfortable conversation to have.
The walkthrough phase is where we can determine what the existing basement systems can support and what must change before finishing is physically possible. That means a direct inspection of the panel, the foundation walls, the floor, and the ceiling height.
Egress requirements are confirmed during a walkthrough based on the intended use of each room, not assumed from the floor plan. A room labeled "office" on a sketch that you intend to use as a bedroom still requires an egress window under code. That confirmation happens during the walkthrough, not after the room is framed.
Understanding the highest-cost elements in a basement finish in Brownsburg is central to how a full project comes together, and the most expensive basement finishing decisions in Brownsburg are best reviewed in the context of the complete scope before any single line item is priced. Homeowners who skip a site walkthrough and move straight to design selections often face scope additions mid-project that an early visit would have surfaced and budgeted from the start.
What should Brownsburg homeowners do before budgeting a basement finish?
Before setting a budget, Brownsburg homeowners should walk their basement with a contractor to identify the four main cost drivers: plumbing rough-in needs, panel capacity, moisture status, and egress compliance. A number chosen before that walkthrough is a starting estimate, not a confirmed budget.
Here are five steps to take before requesting a basement finish quote:
Decide how each room will be used. A bedroom triggers egress window requirements. A bathroom or wet bar triggers plumbing rough-in costs. Room use drives code requirements, and code requirements drive fixed costs.
Have the electrical panel inspected. Confirm the number of available circuit slots and the total amperage rating before pricing out lighting plans, appliance loads, or HVAC equipment for the space.
Check the basement walls and floor for moisture signs. Do this during or after a rainstorm, not on a dry day in summer. Moisture problems that are invisible in dry conditions often show clearly after rain.
Contact the Brownsburg Building Department for the permit requirement list. Knowing which inspections are required, and in what order, helps sequence the project correctly and avoids delays between trade stages.
Walk the space with a contractor before finalizing any design selections. Flooring, fixtures, and finishes are all adjustable. Panel capacity, egress openings, and waterproofing requirements are not adjustable by changing a selection in a design meeting.
Taking these steps before requesting quotes puts you in a position to evaluate contractor proposals accurately, because every bidder is working from the same known conditions.
The Bottom Line
Adding a full bathroom with rough-in plumbing is among the single most expensive elements in a Brownsburg basement finish, and electrical panel upgrades, egress windows, and waterproofing remediation are the three most common budget expanders behind it. All four are generally discoverable before work starts. The site walkthrough is what turns a rough number into a real budget, and skipping it is where the mid-project surprises start.