Brownsburg, IN
Most Important Thing in Countertop Installation | Terry Brodnik

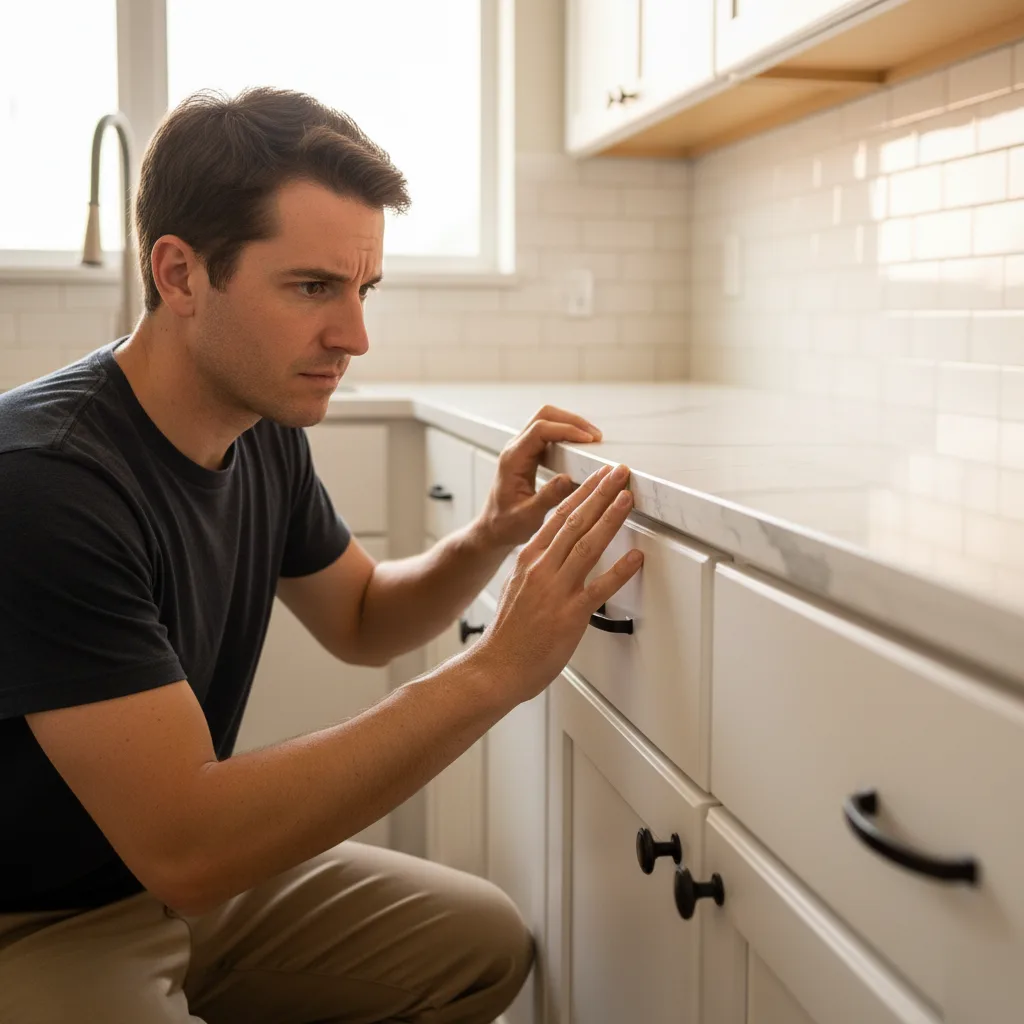
Accurate Templating Is the Step That Determines Everything Else
When Brownsburg homeowners ask about getting new countertops, the team always brings up templating. It's the true secret. Always. A gorgeous stone slab won't do much good if the template is off. Even a tiny bit. This part often gets overlooked. But it sets the stage. The team has seen it make or break a job. It's something you simply can't rush.
Templating creates a precise map of your counter space. The team uses it to mark every wall angle, sink hole, cooktop spot, and edge detail before a single cut happens. Think of it as your counter's specific blueprint. Mess this up, and nothing else will line up later.
What Happens During a Template Visit
A templating tech comes to your home after the cabinets are completely in place and leveled. Timing is big here. Cabinets shifting even a little after the template means the finished counter won't fit right. An easy mistake. Here's what usually happens:
- The tech checks that all base cabinets are level. They must be secured and in their final spot.
- Thin strips or a digital laser tool map the exact shape of each counter section.
- Cutout spots for sinks, faucets, and cooktops get marked very precisely.
- Seam placement is planned then. This depends on slab size and your kitchen's layout.
- Edge styles and overhang sizes are double-checked with you on site.
This visit usually takes about an hour for a typical kitchen. But going too fast is where real trouble starts. It's hard to fix.
Why Small Errors Create Big Problems
A tiny 1/16-inch gap at the template stage can become a noticeable gap against the wall once the stone is cut. Stone doesn't stretch. You can't just bend it to fit. Once it's made, that's it, no going back. Any miscalculation here is permanent.
The team has been in homes all over Brownsburg. We've seen rushed template work. Caulk gaps along backsplashes. Peninsulas that hang uneven. Seams that don't match stone veining. These issues all point to a bad template. Not a flawed slab.
Here's a situation the team has noticed. A family near Arbuckle Acres had new quartz put in by another company. The counter looked fine enough at first glance. But a few weeks in, they saw the sink hole was a little off-center. Water pooled on one side of the basin. The template hadn't accounted for the sink's actual spot. You can't fix that. It means replacing the whole section. A real headache.
What You Can Do to Help
You have a part in getting the template right too. Before the tech shows up, make sure your actual sink and faucet are there. Have your cooktop model confirmed. Don't plan to change cabinet pulls or adjust drawers after that template visit. Everything should be settled.
- Cabinets must be fully installed and firmly attached.
- Plumbing rough-ins should be done already.
- Appliance spec sheets should be easy to find.
- Any tile backsplash goes in after the counter. Never before.
Most Brownsburg countertop installation delays happen because folks aren't ready. The template appointment gets pushed. A week or more delay. No one wants that. It's easy to avoid.
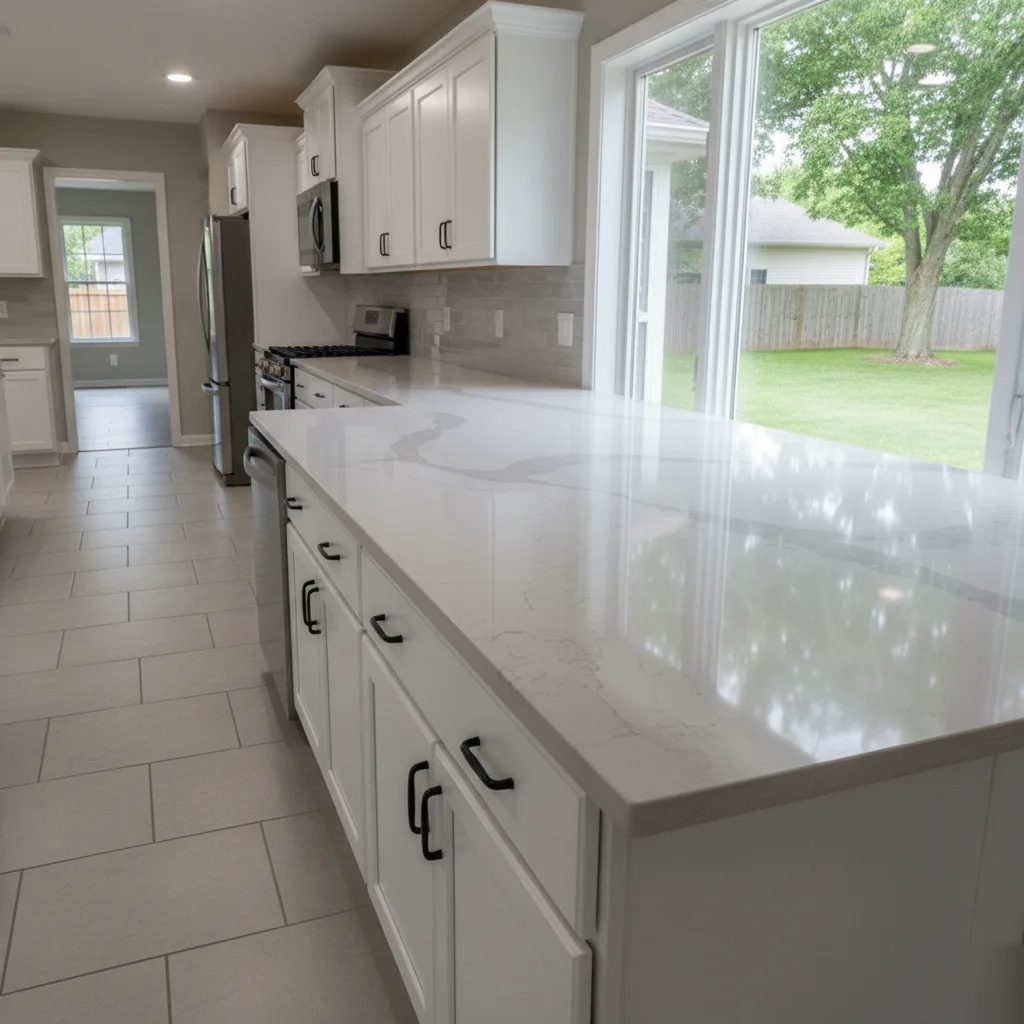
So, if you're planning a kitchen remodel, the template needs your full attention first. Don't worry about the stone color yet. Or the edge style. Those are important choices, yes, but they are just for looks. The template is the real structure. It's the base of a countertop installation that truly fits your home, like it was always meant to be there.
If you want to understand how the team handles this step from start to finish, visit the countertop installation page to see the full process.
Level Cabinets Are the Foundation of a Correct Countertop Install
Most folks don't catch this until it's already too late. They pick out a stunning piece of granite or quartz, get excited about the look, then they see a gap along the wall of their new counter. That issue nearly always comes down to cabinets below. If they aren't level, your countertop installation starts with a real challenge.
The base for counters matters more than the material. More than seam placement, even. Here in Brownsburg, the team sees this often. Especially in homes near Arbuckle Commons and older downtown areas. Houses settle. Floors shift. Cabinets move. A quarter inch or more.
A quarter inch sounds tiny. It makes a big difference.
What Happens When Cabinets Aren't Level
Stone and solid surface counters are stiff. They don't bend to fit an uneven spot. So when cabinets sit at different heights, you quickly get problems that pop up:
- Gaps between the counter and the wall. Caulk just won't hide them.
- A counter that rocks. Especially near the sink hole.
- Cracks that show up over months. This happens often with natural stone.
- Overhangs that don't match. It looks off from across the room.
The team has seen kitchens where installers tried to fix level issues. Wood shims stacked three high under the counter. That's a temporary fix. Not a solution. It puts pressure on tiny points. Weight concentrates in the wrong places. Over time, that pressure can crack the slab. Right near a cutout sometimes.
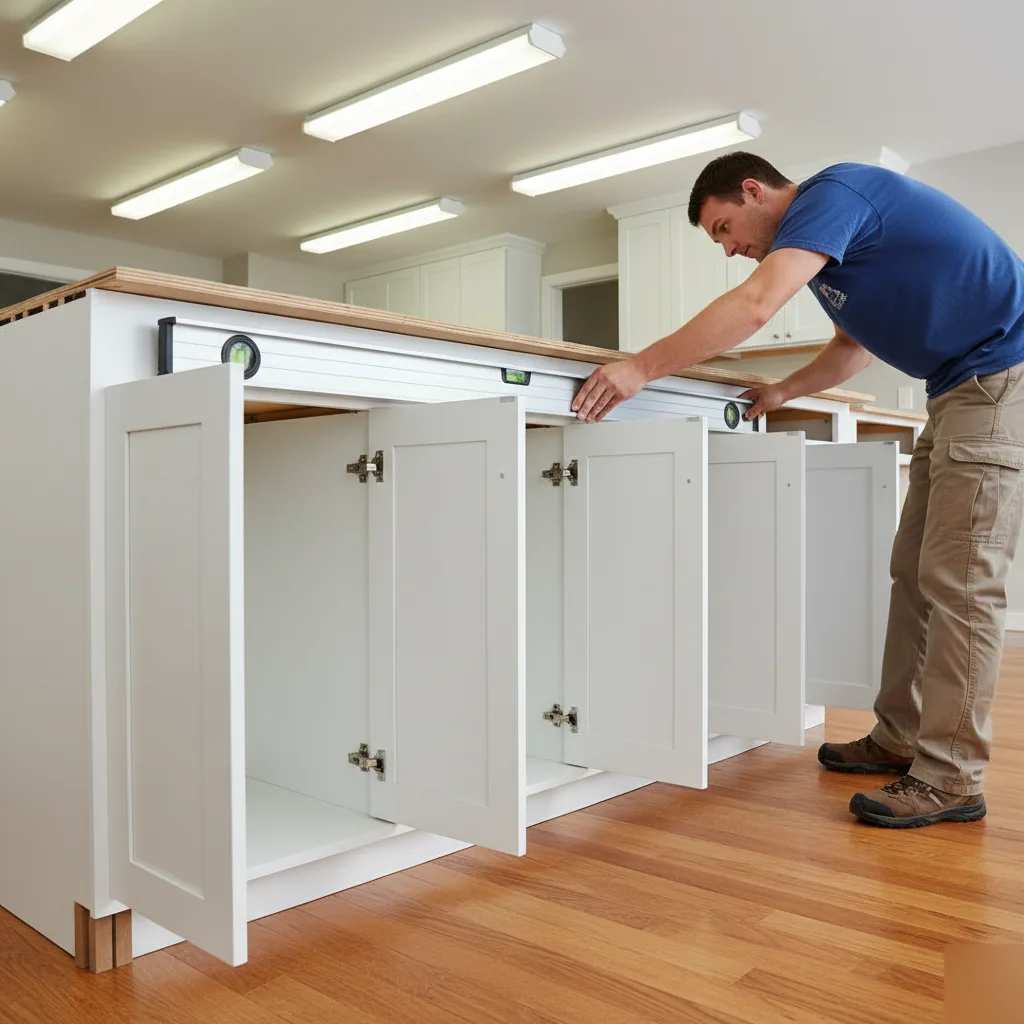
How the Team Checks for Level Before Installation Day
A proper countertop installation starts with a thorough check of every cabinet run. Here's what that process involves:
- A 4-foot level goes across the front of each cabinet section.
- The team checks side to side, across the whole kitchen span.
- Measurements go from cabinet tops to the ceiling. This catches any floor slope issues.
- Any high or low spots get marked. We fix them before templating.
- Shims go under the cabinets themselves, at the base. Not under the counter slab on top.
This step happens before any template is even made. And it's a bigger deal than most homeowners expect. The National Kitchen and Bath Association states bad prep work is a top reason for counter failures. This truth often gets lost. Everyone gets excited about new materials.
Indiana homes built in the 1980s and 1990s often have settling problems. Many Brownsburg homes from that time sit on crawl spaces. Those can shift with seasonal moisture changes. The team always looks for this during the first visit. Catching a level problem early saves everyone a real headache later on. It's a practical, grounded truth.
But new cabinets can still be off. Installers sometimes rush. They leave small flaws. These only show once a rigid counter sits on top. Planning a full kitchen remodel? Make sure your cabinet installer and your countertop installer communicate. One trade's quick cut can become the next's big problem.
Getting the cabinets right isn't exciting work. No one posts photos of a level resting on a cabinet box. But it's the single most important step. It decides if your countertop installation looks perfect, or just a little off, for the next couple of decades.
Seam Placement Affects Both Appearance and Structural Integrity
Most Brownsburg homeowners don't think about seams. Not until they see one in a bad spot. That's the plain truth. A seam in the wrong place can crack. It collects grime. It pulls your eye to a part you want to ignore. A well-placed seam? You'll forget it's there.
Seams happen whenever your countertop installation needs pieces of stone or solid surface joined together. L-shaped kitchens require them. Long stretches of counter definitely need them. Islands with an overhang also need joints. The real question isn't if you'll have seams, it's about where they're going to be.
Where Seams Should Never Land
The team has seen seams right over dishwashers. They've been put next to sink cutouts. We've even seen them in busy prep spots. Every one of those spots is a future headache. Heat, moisture, and constant use stress these areas. A seam there flexes. It weakens faster. Much faster than one in a quieter section. It's a basic error.
Here are the definite no-go areas:
- Directly above a dishwasher. Steam rises there.
- Within a few inches of any cutout. Think sink or cooktop.
- Across unsupported sections. Where the counter bridges open space.
- Right in the middle of your main cooking area. You'll be staring at it daily.
A smart fabricator plans seam placement before cutting any slab. The layout goes onto a template. Every joint gets placed for strength first, with how it looks coming second. That's a mark of real craftsmanship.
How Seam Placement Ties to Your Slab Layout
Here's something many don't realize. The stone's vein pattern matters. As much as seam location. If veins don't flow across the joint, the seam stands out. A good fabricator lines up slabs. The pattern keeps going. It takes more layout time. Worth every minute. You'll appreciate it.
Lots of ranch-style and two-story homes around Brownsburg have galley or L-shaped kitchens. Those layouts almost always need at least one seam. The team plans those joints to fall at logical points. For instance, where the counter makes a corner or where a smaller piece meets the main run. This often streamlines the timeline, actually.
What a Proper Seam Actually Looks Like
A tight seam in natural stone should be about 1/16 of an inch wide, sometimes even smaller. The epoxy, which matches the stone color, fills that tiny gap. It bonds the two pieces together. When it's done right, you have to run your finger over the surface to even feel it. And even then, it should feel pretty much flat.
Structural strength matters too. Support under the seam needs to be solid. No gaps in cabinet framing. No misaligned plywood joints. If the support moves, even a little, that seam will crack. Visible in months. The team checks cabinet level and support. Always. Before setting a seam position. It's a make-or-break detail.
One Brownsburg kitchen the team worked on had a 12-foot island. The homeowner wanted no seams. But slabs max out at 10 feet. A seam was needed. Placed at the far end. A low-use section. Quartz veining matched carefully. That joint became invisible. To everyone, except the installer. They always know.
Seam placement isn't glamorous. No one posts about it. But it's a key detail. It separates a lasting countertop installation from one that fails. Planning a kitchen project? Talk to the team about your countertop installation. Before any cutting happens. It saves trouble later.
Frequently Asked Questions
What is the single most important thing to get right in a countertop installation?
Accurate templating is the most important step in any countertop installation. The template is a precise map of your counter space. It marks every wall angle, sink hole, and edge detail before any cutting happens. If the template is off — even by 1/16 of an inch — the finished stone won't fit correctly. Stone can't be stretched or bent after it's cut. Getting this step right protects every other part of the job.
Why do cabinets need to be level before countertops are installed in Brownsburg homes?
Cabinets must be fully level because stone and solid surface counters are rigid — they don't flex to match an uneven base. Brownsburg homes, especially older ones near downtown and Arbuckle Commons, can shift and settle over time. Even a quarter-inch difference in cabinet height can cause gaps along the wall, a rocking counter, or cracks near cutouts. Fixing this before templating is the right move. Shims belong under the cabinet base, not under the stone slab.
What's a common mistake homeowners make before the template visit?
The most common mistake is not having everything finalized before the templating tech arrives. Your actual sink, faucet, and cooktop model all need to be confirmed ahead of time. Cabinets must be fully installed, leveled, and secured. Plumbing rough-ins should already be done. If anything changes after the template is made, the measurements may no longer be accurate. This is one of the top reasons countertop installation projects in Brownsburg get delayed by a week or more.
Should tile backsplash go in before or after the countertop?
Tile backsplash should always go in after the countertop is installed — never before. Installing tile first can throw off the template measurements and create fitting problems at the wall. The countertop needs to sit in its final position first. Then tile gets set above it. This order keeps everything clean, tight, and properly aligned. Swapping the order is a small mistake that causes a visible, hard-to-fix problem.
How does Brownsburg's climate affect countertop installation timing?
Brownsburg's seasonal temperature swings can affect how homes settle and shift. Floors and cabinets can move slightly between winter and summer. That movement matters during installation. Scheduling your template visit and installation close together — ideally within the same project window — reduces the risk of cabinets shifting between those two steps. If too much time passes between cabinet install and templating, recheck your cabinet level before the tech arrives.
Where can I learn more about how the full countertop installation process works?
The full process — from cabinet prep to final seam placement — is covered in detail on the countertop installation page. That page walks through each phase so you know exactly what to expect. Understanding the steps before your project starts helps you ask better questions and avoid the most common problems. Good preparation leads to a countertop that fits like it was always meant to be there.